 LaserJet
6P/ 6MPLaserJet
6P/ 6MP
LaserJet
6P/ 6MPLaserJet
6P/ 6MP |
Language:
PCL Level 6, Optional Adobe Postscript Level 2(standard
on 6MP) Speed: 6 PPM Memory: 2MB Standard, (3MB on 6MP) Exp. to 50MB on 6P, 35MB on 6MP Graphics: 600dpi Duplex: Not Available RET: Yes |


Unprintable Regions: .14 inch all sides
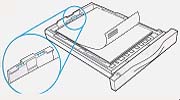
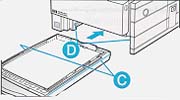
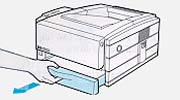
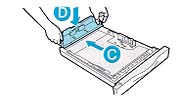
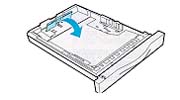
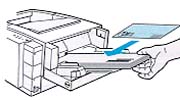
Note: Tray 2 is designed for paper use only. Use Tray 1 to print envelopes, labels, transparencies, cardstock or custom-sized media.
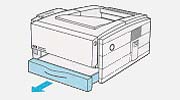
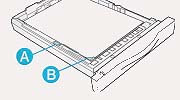
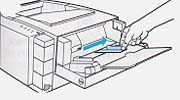
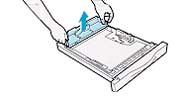
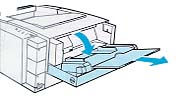
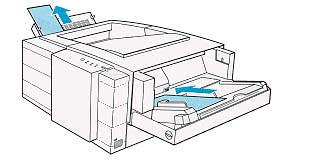
Tray 1 (multi-purpose) holds up to 100 sheets of paper or up to 10 envelopes.
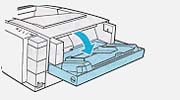
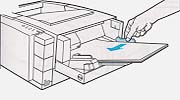
Note: Do not add media to Tray 1 while the printer is printing. This could cause a paper jam.

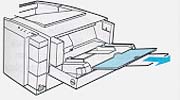
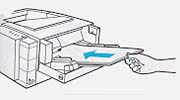
The manual feed feature allows you to feed paper from Tray 1 rather than automatically feeding from Tray 2. Manual Feed and Manual Feed with Pause are available in most software applications under the Print or Printer Setup options.
Manual Feed
If the Manual Feed option is turned on, the printer will automatically print on the media located in Tray 1. If Tray 1 is empty, the Tray 1 status light will remain on until media has been loaded. The printer will automatically print once the media is in place.
Manual Feed with Pause
If the Manual Feed with Pause option is turned on, the printer will pause between each page in the print job. When the Tray 1 status light blinks, make sure the correct media is loaded in Tray 1 and press the Go button on the printer to print each page.
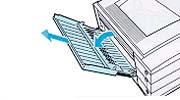
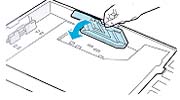
Postcards, 3 x 5 (index) cards, and other custom-sized media can be printed from Tray 1.
Custom-Sized Media Guidelines
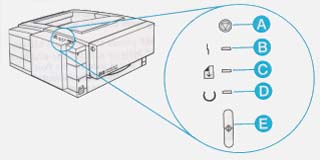
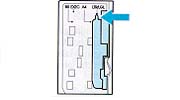
Error Light - B
Data Light - C
Ready Light - D
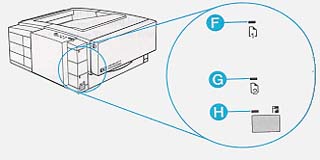
Tray 1 Status Light -F
Tray 2 Empty Light - G
IR Status Light - H
Light patterns provide both status and error messages. The lights can either be on, off or blinking.
Ready Light on - Printer is ready to print. No action is needed
Data light on and Ready light blinking - The printer is receiving or processing data. No action is needed.
Data light and Ready light both remain on - There is unprinted data in the printer. Press Go to start printing.
Each light briefly turns on and off, in sequence - The printer is warming up, processing a self test, or canceling a print job. No action is needed.
Tray 1 status light on - A job has been sent to Tray 1, and the tray is out of media. Add desired media into Tray 1. The printer will automatically begin printing.
Tray 1 status light blinks - A print job has been sent to the printer with a "Manual Feed with Pause" request. Put desired media into Tray 1, and press Go to begin printing.
Tray 2 empty light on - Tray 2 is empty. Add paper to Tray 2.
IR status light on - A job is being sent form an IrDA-compliant device, such as a laptop or notebook computer, to the printer. No action is needed.
Error light is on, all other lights off - Recoverable error:
Error light is on and Data light is on - Data error. To determine the cause of the data error, simultaneously press and hold Go and Job Cancel. A secondary light pattern will indicate the specific error:
Error light on - Memory overflow. Printer memory is full. Press Go to resume printing. if you lose some data try to free some printer memory by removing any unnecessary fonts, macros, or any data currently in printer memory. If you continue to lose data you may need to add more printer memory. For a temporary solution simplify the image or print at a 300 dpi resolution.
Data light on - Print Overrun. The print job was too complex for available printer memory. Press Go to resume printing. if you lose some data you may need to add more printer memory. For a temporary solution simplify the image or print at a 300 dpi resolution.
Ready light on - IO Error. The cable between the printer and computer has a bad connection or the cable is of poor quality. Check the cable connections to see if they are secure. Make sure you are using a high-quality cable.
Tray 1 light on - Temporary Connection Break. An abnormal break during transmission of the data from the computer to the printer. Press Go to clear the error message and print the job again.
Error and Data lights on - Continuable Error. A temporary error occurred during printing. Press Go. The page will automatically reprint.
Data and Ready lights on - Continuable Error. A temporary error occurred during printing. Press Go. The page will automatically reprint.
Ready and Tray 1 lights on - Continuable Error. A temporary error occurred during printing. Press Go. The page will automatically reprint.
Tray 1 and Tray 2 lights on - Temporary Error. The printer detected a temporary error condition. Reset the printer by briefly turning the printer off and back on. If the problem persists, contact your dealer or HP service representative.
Error, Data and Ready lights on - Temporary Error. The printer detected a temporary error condition. Reset the printer by briefly turning the printer off and back on. If the problem persists, contact your dealer or HP service representative.
Error, Data and Tray 1 lights on - Temporary Error. The printer detected a temporary error condition. Reset the printer by briefly turning the printer off and back on. If the problem persists, contact your dealer or HP service representative.
Error, Ready and Tray 1 lights on - NVRAM Error. The nonvolatile memory (NVRAM) is temporarily full. Press Go to clear the message. Check the printer settings to ensure they are correct. if the problem persists, contact you dealer or HP service representative.
Data, Ready and Tray 1 lights on - NVRAM Error. The nonvolatile memory (NVRAM) is temporarily full. Press Go to clear the message. Check the printer settings to ensure they are correct. if the problem persists, contact you dealer or HP service representative.
Error, Data, Ready and Tray1 lights on - Service Error. The printer detected a problem requiring service. Contact your dealer or HP service representative.
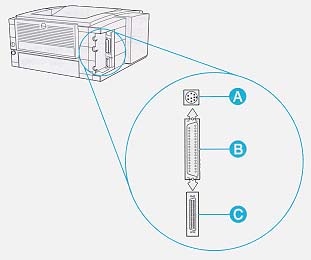
Error and Tray 1 or 2 lights on - SIMM Error. A problem has been detected concerning an installed SIMM:
Error, Data, Ready and Tray 1 lights on - Fatal Error. The printer has experienced a serious error. Reset the printer by briefly turning the printer off and back on. If the same light pattern appears, turn the printer off for 10 minutes. If the light pattern appears again, contact your dealer or HP service representative.