 |
Language:
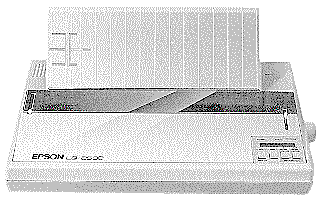
Epson ESC/P Speed: Draft 324 CPS, LQ 108 CPS Graphics: 60,180, 360 DPI No. of Pins: 24 |
Internal Fonts
| Typeface | Quality | Height | Pitches |
| Epson Draft | Draft | 6, 8, 10, 12, 14, 15 and 16 pts. | 20, 14, 12, 10, 8.5, 8 and 7.5 CPI and proportional |
| Roman | Letter Quality | 6, 8, 10, 12, 14, 15 and 16 pts. | 20, 14, 12, 10, 8.5, 8 and 7.5 CPI and proportional |
| Sans Serif | Letter Quality | 6, 8, 10, 12, 14, 15 and 16 pts. | 20, 14, 12, 10, 8.5, 8 and 7.5 CPI and proportional |
| Courier | Letter Quality | 6, 8, 10, 12, 14, 15 and 16 pts. | 20, 14, 12, 10, 8.5, 8 and 7.5 CPI and proportional |
| Prestige | Letter Quality | 6, 8, 10, 12, 14, 15 and 16 pts. | 20, 14, 12, 10, 8.5, 8 and 7.5 CPI and proportional |
| Script | Letter Quality | 6, 8, 10, 12, 14, 15 and 16 pts. | 20, 14, 12, 10, 8.5, 8 and 7.5 CPI and proportional |
Continuous Feeding
Tractor Feed: Standard
Manual Feeding
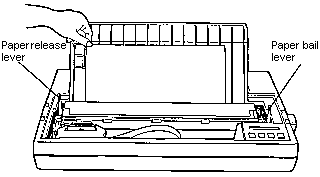
Preparing the printer for single-sheet feed


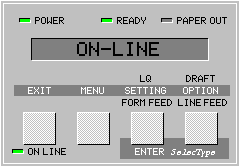
The SelecType Main Menu
The SelecType main menu lists the four modes that let you control printer functions and operation. Whenever you exit from any of the modes, you always return to the main menu. An * next to the name the mode indicates that you're in the main menu.
Change Macro
The 14 settings and their options shown in the following table control printing and printer operation. These settings are the heart of the SelecType system. (There are additional settings that can be changed in the *Change Defaults mode).
| Select with SETTING | Change with OPTION |
| PRINT QUALITY | Draft, LQ |
| FONT | Roman, Sans Serif, Courier, Prestige, Script |
| PITCH | 10 CPI, 12 CPI, 15 CPI, Proportional |
| CONDENSED | On, Off |
| FORM LENGTH | xx.x” (4” to 22” in 1/2” steps) |
| 1” SKIP | On , Off |
| RIGHT MARGIN | xxx (Left Margin + 1-136) |
| LEFT MARGIN | xx (0-80) |
| CG TABLE | Italic, Graphic, Download |
| COUNTRY | USA, France, Germany, UK, Denmark 1, Sweden, Italy, Spain 1, Japan, Norway, Denmark 2, Spain 2, L. America |
| PRINT DIR. | Bi-D, Uni-D |
| HALF SPEED | On, Off |
| SHEET FEEDER | Off, Single, Double |
| *DEFAULT BIN | 1,2 (only displayed when double-bin sheet feeder Is selected.) |
The LQ-2500 uses a list of these settings, called the current printer settings, whenever it prints. This means there are actually six lists of settings stored in the printer's memory - the current printer settings, the settings for each of the four macros, and the default settings.
Change Defaults
The defaults are the settings in effect when your turn the printer on. The following table shows the default settings and options for the LQ-2500.
| Select with SETTING | Change with OPTION |
| INTERFACE | Parallel, Serial |
| *BAUD RATE | 300, 600, 1200, 2400, 4800, 900, 19200 |
| *PARITY | None, Even, Odd, Ignore |
| AUTO LINE FEED | On, Off |
| SLCT-IN | Valid, Invalid |
| DEFAULT MACRO | #1, #2, #3, #4 |
The preset defaults
When you receive your LQ-2500, the defaults are already set for a parallel interface. The default settings are:
INTERFACE Parallel
AUTO LINE FEED Off
SLCT-IN Valid
DEFAULT MACRO #1
NOTE: If you change the default settings the printer does not recognize the new settings until you turn the power OFF, then turn it back ON again.
Changing the Defaults
To change the default settings follow these steps:
PRINT OUT SETTINGS
The Print Out Settings mode gives you an immediate printout of the six SelecType listings.
Printing out the settings
The interface connector is located on the back of the printer.
Parallel
Availability: Standard
Connection: Centronics Female
Activation: SelecType Menu
Serial
Availability: Standard
Connection: RS-232 Serial interface
Activation: SelecType Menu