 |
Language:
PCL Level 5 (HP LaserJet 4), Epson ESC/P2, Epson ESC/P Speed: 6 PPM Memory: 2MB, exp. to 64 MB Graphics: 600 x 600 dpi Autorotate: Yes Duplex: Not Available |


Internal Fonts HP 4 Emulation Mode
| Typeface | Style/Weights | HP Equivalent |
| Flare Serif 821 SWC | Medium, Extra Bold | Albertus |
| Incised 901 SWC | Medium, Bold, Italic | Antique Olive |
| Swiss 721 SWM | Medium, Bold, Italic, Bold Italic | Arial |
| Zapf Humanist 601 Demi SWC | Medium, Bold, Italic, Bold Italic | CG Omega |
| Dutch 801 SWC | Medium, Bold, Italic, Bold Italic | CG Times |
| Clarendon Condensed SWC | Condensed | Clarendon |
| Ribbon 131 SWC | Coronet | |
| Courier SWC | Medium, Bold, Italic, Bold Italic | Courier |
| Original Garamond SWC | Antiqua, Halbfett, Kursiv, Kursiv Halbfett | Garamond |
| Letter Gothic SWC | Medium, Bold, Italic | Letter Gothic |
| Audrey Two SWC | Marigold | |
| Symbol Set SWA | Symbol | |
| Dutch 801 SWM | Medium, Bold, Italic, Bold Italic | Times New |
| Swiss 742 SWC | Medium, Bold, Italic, Bold Italic, Medium Condensed, Bold Condensed, Medium Condensed Italic, Bold Condensed Italic | Univers |
| More Wingbats SWM | Wingdings | |
| Line Printer (bitmap) | Line printer |
Internal Fonts Epson LQ-2500 Emulation Mode
| Typeface | Point | Pitch | Style | Weight |
| Courier | 12 | 10 | Upright | Medium |
| Courier | 12 | 10 | Upright | Bold |
| Courier | 10 | 12 | Upright | Medium |
| Courier | 10 | 12 | Upright | Bold |
| Line Printer | 8.5 | 16.66 | Upright | Medium |
| Prestige | 10 | 12 | Upright | Medium |
| Prestige | 6 | 20 | Upright | Medium |
Symbol Set Emulation Modes
| Symbol Set | HP 4 | Epson LQ |
| Epson Graphics | no | yes |
| Epson Italic | no | yes |
| ISO ANSI ASCII | yes | no |
| HP German | yes | no |
| HP Spanish | yes | no |
| HP Legal | yes | no |
| HP Roman Extension | yes | no |
| ECMA94 Latin-1 | yes | no |
| HP Roman-8 | yes | no |
| HP IBM-US | yes | no |
| HP IBM-DN | yes | no |
| PC Multilingual | yes | yes |
| PC USA | no | yes |
| PC Nordic | no | yes |
| PC Portuguese | no | yes |
| PC CanFrench | no | yes |
Optional Fonts HP 4 Emulation Mode
The printer uses fonts compatible with the HP LaserJet 4. See HP LaserJet 4 Cartridges
Unprintable Regions
Left: 50 dots (0.167")
Right: 50 dots (0.167")
Top: 50 dots (0.167")
Bottom: 50 dots (0.167")
Continuous Feeding
Standard Tray: Letter size, 100 sheets
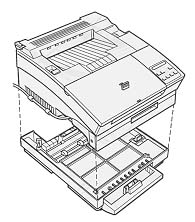
Optional Trays: Lower
cassette, 250 sheets
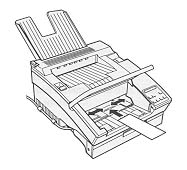
When the printer is out of paper, it goes off line so you can reload paper in the tray.
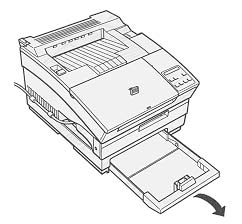
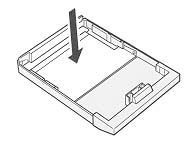
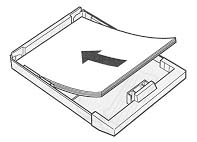
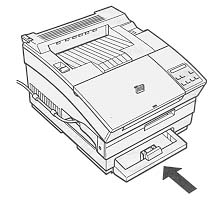
To load a stack of paper in
the printer's paper tray, fan the paper, open the paper cover,
adjust the paper guides for the proper width, and insert the
paper into the tray. Then close the cover.
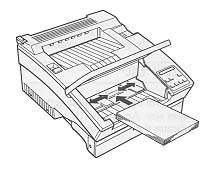
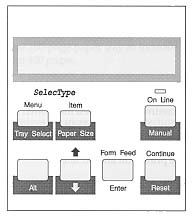
Once you have loaded paper, put the printer back on line by
pressing the On Line button.
By default, the printer is set up to expect letter-size paper to be loaded in both the standard tray and optional lower paper cassette. If you load paper of a different size, you need to use the control panel to update the printer for the paper size loaded in the tray. This cannot be done from your software.
The printer stops after printing the single sheet. If you want to print additional pages, load another sheet and press the Manual button. Repeat the above procedure for each sheet you need to load manually.
Once you are finished manually printing sheets, replace the paper in the paper tray and close the cover. To take the printer out of manual feed, either use your software or the control panel, depending on how you initially selected manual feed.
| Message | Meaning |
| CHECK PAPER SIZE | The paper size specified from the software is different than the paper size specified by the STD SIZE and OPT SIZE settings. Check to see if the correct paper size is loaded in the standard tray or optional lower cassette. You may need to change the STD SIZE and OPT SIZE settings to match the paper size. |
| EEPROM ERROR | The printer found illegal data in the EEPROM memory. Press the Continue button to continue. You should also check that any SelecType settings you changed from the factory defaults are still in effect. |
| FEED JAM | Paper is not feeding intot he printer from the specified tray or cassette or has jammed on its way into the printer. Remove the jammed paper and press the Continue button. |
| ILLEGAL CART | The printer cannot read the font cartridge inserted. To correct this error, turn off the printer. Then remove the cartridge and reinsert it. |
| IMAGE OPTIMUM | There is insufficient memory to print the page using the specified print quality. The printer automatically reduces the print quality so it can continue printing. If the printout is not acceptable, try simplifying the page by reducing the number of fonts or font sizes or by switching the resolution to 300 dpi. You may also need to increase the amount of printer memory. |
| INSERT CART | You may have removed an optional font cartridge while the Form Feed light was on (indicating print data was received but not yet printed). To correct the error, reinsert the font cartridge and press the Continue button. |
| MANUAL FEED (page size) | Manual feed is specified for the current job. Make sure the specified paper size is loaded in the standard paper tray and press the On Line button. If you do not want to print using manual mode, press the Continue button. |
| MEM OVERFLOW | The printer has
insufficient memory available for the current task. To
correct the error, press the Continue button. if the
message remains, reset the printer. You can also clear
this message by turning the printer off and then on
again. If you continually receive this message when printing a particular page, try simplifying the page by reducing the number and size of fonts or by using 300 dpi resolution. You can also add more memory to the printer. |
| PAPER JAM | Paper is jammed in the paper path. Open the printer cover and clear the jammed paper. |
| PAPER OUT (paper source) (paper size) | There is no paper in the specified tray. Load paper of the specified size and press the On Line button. |
| PAPER SET (paper source) (paper size) | The paper loaded in the specified tray does not match the required size. Replace the paper in the tray with paper of the specified size and press the Continue button. The printer automatically updates the TRAY SIZE setting for the specified paper size. |
| PC INSTALL | The optional lower
paper cassette is not installed but it is specified as
the paper source. Turn the printer off, wait ten seconds,
and turn the printer back on. Check the paper source setting in your software to be sure that the standard tray is selected. |
| PRINT OVERRUN | The required time to process the print data exceeds the print engine speed because the current page is too complex. Press Continue to resume printing. If this message appears again, change the PAGE PROTECT setting in the JOB menu. |
| PRINTER OPEN | The printer cover is open. Close the printer cover to continue printing. |
| RAM ERROR 1 or 2 | The specified SIMM cannot be used. Remove SIMM 1 or SIMM 2 as appropriate. Reinstall the SIMM. |
| READY | The printer is ready to receive data or to print. |
| REMOVE CART | You may have inserted an optional font cartridge while the Form Feed light was on. To correct the error, remove the cartridge, reinsert it into the slot, and press the Continue button. |
| RESET | The printer's current interface port has been reset and the buffer cleared. However, other interface ports are still active and retain their settings or data. |
| RESET ALL | All printer settings have been reset to the specified settings. |
| RESET TO SAVE | You have changed a SelecType setting but the new setting has not yet been enabled. To enable the new setting, hold down the Alt button and press Reset. |
| SELF TEST | The printer is performing an internal check cycle. Please wait a few seconds until the check is finished. |
| SERVICE REQ.XXXX | A controller error or a print engine error has been detected. Write down the error number listed on the display and turn off the printer. Wait at least fice seconfs and then turn it back on. If the error message still appears, turn off the printer, unplug the power cord, and contact a qualified service person. |
| STANDBY | The printer is currently in a low-power state. (When the printer is not used for 15 minutes, it enters standby mode.) Press any button or send data to warm up the printer. Warm-up takes approximately 30 seconds. |
| TONER LOW | The printer is almost out of toner. When you see this message, you must replace the imaging cartridge soon. |
| TONER OUT | You must replace the imaging cartridge. To print one additional page, press Continue. |
| WARMING UP | The printer is warming up. Warm-up takes approximately 30 seconds. |
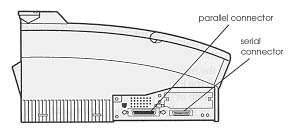
Parallel
Availability: Standard
Connection: Centronics Female
Activation: Panel
Serial
Availability: Standard RS-232C
Connection: DB 25
Activation: Panel

Optional Interface Boards:
#C823071 32KB serial Interface, #C82310 32KB Parallel Interface, #C82314 Twinax (for direct connection to IBM mini or mainframe), #C82315 Coax (for direct connection to IBM mini or mainframe)